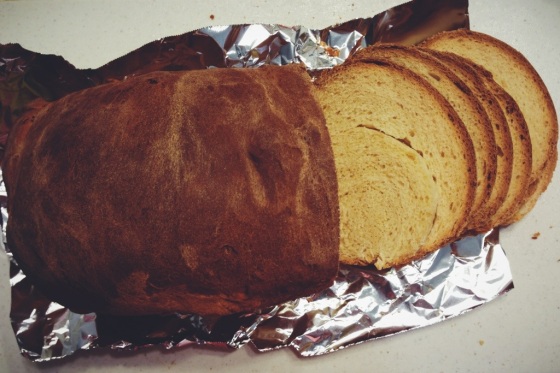
*Sigh* That is one beautiful loaf of bread, isn’t it? I made two loaves of “sandwich” bread Friday tonight to help confirm if the one I am featuring in this post is the holy grail recipe for sliced white bread that one would use for sandwiches. And yes, it is (although my guest taster sister preferred the buttermilk one)! So I bet you’re wondering why I’m even baking such a plain jane type of bread when I could easily go to Kroger and purchase a loaf. Here are the reasons: 1. I love a baking challenge; 2. I prefer homemade; 3. DO YOU KNOW HOW MANY PRESERVATIVES ARE IN MASS-PRODUCED BREAD??; 4. The flavours that result in homemade bread cannot be recreated in the fast rises that mass-produced breads go through. Also, kneading bread is a great bicep workout ;) . The secret to this bread is that condensed milk is used instead of regular (fresh??) milk. I’m not sure of the science behind it, but the condensed milk creates a moist, tight crumb with a subtle, toasty sweetness that I would liken to a… toasted marshmallow, perhaps? Condensed milk has a complex caramel-y flavour to me and definitely does the job better than granulated sugar and milk!
Many people find the process of making bread really daunting, and I was one of those people in the beginning. I’ve come to the conclusion that it’s the time commitment that scares people off. Because I’m pretty sure all of you can measure 3 1/2 cups of flour and 1/2 cup of condensed milk! Also, the butter wrapping has tick marks for you to cut the required amounts! Getting water that’s warm enough for you to shower in is also something I can see any of you screwing up hah. See, it’s not hard! The waiting game is though! Take your time when you’re rising your bread. It may say an hour to double in size, but it may take longer. Trust yer eyeballs! The flavours in the bread develop during these risings! All this said, bread making from scratch is super relaxing. Stressful day? Knead some dough!

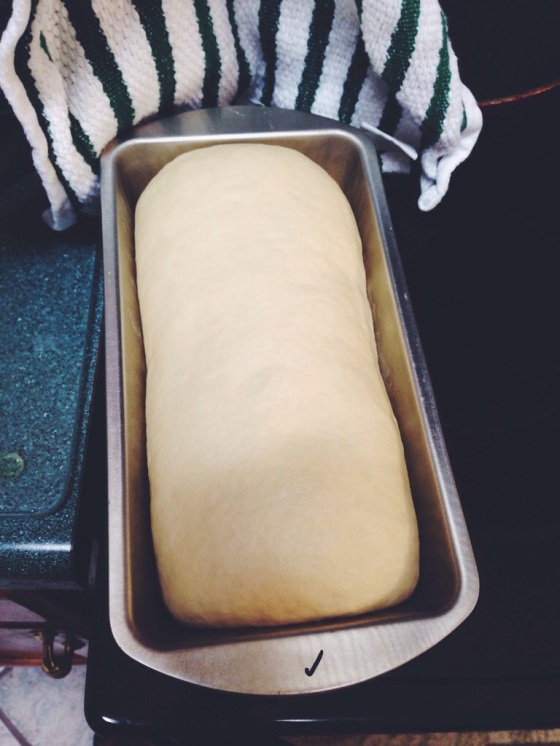
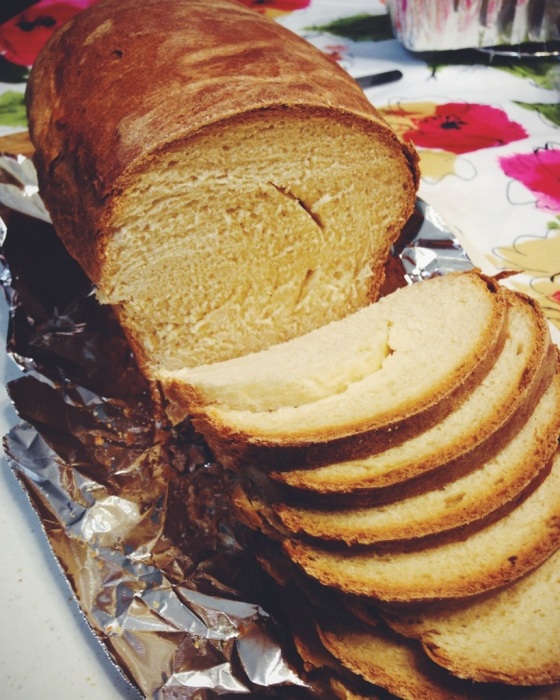
Don’t tell anyone, but I get my loaf tins from the Dollar Tree. I’ve baked many a loaf of pumpkin spice and banana bread in those lil’ buddies (as you can see, I have a checkmark on this tin– banana bread experiments)! In the picture above, the loaf is going through its second rise. Make sure to shape your bread nicely before this rise! Otherwise you’ll end up with a lopsided loaf. I learned that the hard way. Make sure to punch out the dough into an even rectangle of the same thickness throughout before rolling it up like a Swiss roll (roll tightly!) and plopping it into your greased tin. In the picture below, you can see that I didn’t roll tightly enough, because there are holes in the crumb and the crust has separated from the side of the loaf :(
Enough chit chat. Recipe’s under the next photo!

Sandwich Bread – 1 Loaf
INGREDIENTS:
1 cup water (The recipe calls for room temp., but I use lukewarm to help start the yeast.)
2 tsp active dry yeast
1/2 cup sweetened condensed milk
1 tbs butter (or margarine, but go with the butter, please??)
1 tsp salt
3 1/2 cups flour (may be more or less depending on the weather)
PROCEDURE… adapted from an About.com recipe:
1. In a microwaveable bowl or large Pyrex measuring cup, add your water, condensed milk, butter, and salt. Nuke it in the microwave in intervals of 30 seconds until it is the temperature of water that you would bathe in (or in professional terms, lukewarm). Add the yeast, stir, and watch to make sure yeast activates aka gets a little frothy looking. While waiting for that to happen, this is a good time to grease your loaf pan with butter!
2. Place 3 cups of flour in a large bowl or your mixing bowl that attaches to the electric mixer and slowly add the liquid mixture, waiting until it combines with the flour before adding some more. When it comes together, pour it out onto a floured surface and knead for about 4 minutes until the dough is smooth and soft. Oil a bowl and place the dough in, making sure to grease the dough too. Cover bowl with a cloth and let rise for about an hour of until the dough has doubled in size.
3. After doubling in size, turn the dough out and using your fingertips, shape and flatten the dough into a rectangle that is the width of the loaf pan. Roll up the rectangle tightly and place into the loaf pan. Cover the loaf with a damp cloth and let rise for another hour or until doubled in size.
4. Bake loaf at 350°F for 45-50 minutes or until the crust is golden brown (My loaves took about 55 minutes.). After finished baking, remove from tin and allow to cool fully on rack before slicing. Okay, let cool almost all the way with a little warmth left, so you can slather some butter on a slice and let it get melt-y before eating!
Enjoy!
