And October is upon us… But wait, I’m still daydreaming about cooler weather and fire-coloured foliage, because in my part of the country, it’s still summertime. Pumpkin everything has popped up, but you could feed me strawberries and watermelon and fool me! This year is flying by frighteningly fast, and we’re inching towards the gluttonous months at full speed! Therefore, it seems appropriate to start October off with a recipe post.
Growing up, I’ve always been taught never to waste food. Whenever I told my mom or aunt I was full or finished eating but had scraps of food left over, I would always be reminded that children in Africa were starving and that I should clean my plate. Hilariously, my African friends tell me that the same tactic was utilized by their parents but replaced with Asian children. So it’s always been ingrained in my head that wasting food (or things of any sort) is pretty high on the shelf of “qualities of a bad person,” at least for Asian people. As a kid, I always watched my aunt cook and bake, and she would always repurpose leftovers into another dish for the following dinner. In that sense, I like to think that I’ve taken on that inventive/frugal side of her for finding ways to stretch meals without making them boring and repetitive.
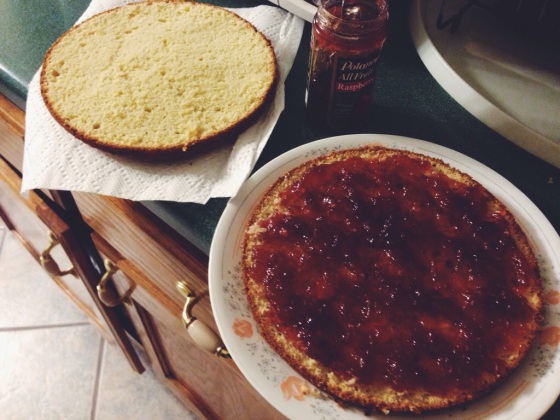
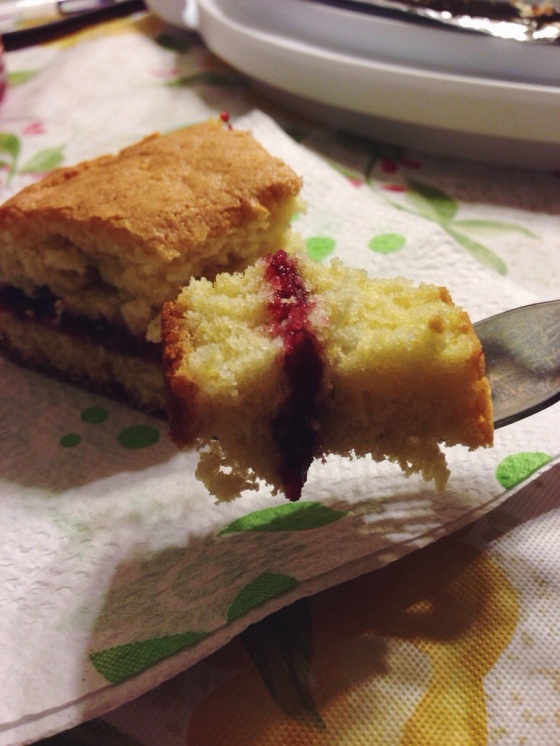
This leads into the trouble I have with buttermilk. As a 22 year old, I’m not really one to be waking up at the crack of dawn to make fresh biscuits every morning for my family, so I usually have a pretty full bottle of buttermilk after using the 1/4 cup needed for the recipe I bought it for. Since it’s dairy, it definitely doesn’t last forever, so I’ve found out via food forums that it freezes fine, which solves basically all issues that I have with buttermilk and my frugality! Yippee! However, knowing that I can’t just make biscuits and strawberry cake out of buttermilk (although both are heavenly, esp. the biscuits) I decided one day to Google “buttermilk cake” and looked for the simplest recipe out there. And I stumbled along Kitchen Trial and Error’s adaptation of a Joy the Baker recipe. I’ve made it once before, and I made it again tonight. It’s a seriously simple and basic cake to make and a must have in one’s repertoire. This cake is dense, rich, and moist, and the top crust bakes up to a slight caramelized crunch that my sister said reminds her of candy. For my version, I decided to slice my cake in half and sandwich raspberry jam in between. The tartness of the raspberry jam works to cut the sweetness in the cake. It’s simply bliss, you guys!!!! I had to refrain from doubling the recipe and making a full on layer cake out of this recipe. Now that I think of it, this recipe would honestly make for a great yellow layer cake recipe with its dense crumb… {Recipe below…}
 There’s something crazy relaxing about spreading the jam onto the cake.
 I’m drooling at the fact that this cake is even better after sitting for a while, because the jam seeps into the cake itself a little. Fireworks in yo mouth.
Buttermilk Raspberry Sandwich Cake
INGREDIENTS:
1 1/2 cups flour
1/4 tsp baking powder
1/4 tsp baking soda
3/4 tsp salt
6 tbs unsalted butter, room temperature
1 cup sugar
1 egg + 1 egg yolk
2 tsp vanilla extract
1/4 cup buttermilk
PROCEDURE… adapted from Kitchen Trial and Error:
1. Preheat your oven to 375°F. Grease the bottom and sides of an 8″ round cake pan and set aside. {I used an 8″ cake pan and liked the resulting thickness of the cake; it was perfect for cutting in half and sandwich jam in between.}
2. In a medium bowl, whisk the flour, baking powder, baking soda, and salt and set aside.
3. In a separate bowl, beat the butter and sugar until creamy and light in color (The butter adn sugar don’t necessarily get creamy as it would for cookies– it’s more like a smooth, sandy texture). Add egg, yolk, and vanilla and mix until mixture is smooth and combined.
4. Add half of the flour mixture and mix until almost incorporated. Add the buttermilk and mix until almost incorporated. Add the remaining flour and mix until incorporated.
5. Spoon the batter into the prepared pan and smooth out so it’s even. Bake for approx. 30 minutes, or until a skewer comes out clean.
6. Let cake cool until warm too the touch and turn it out onto a plate or cake dish. Take a serrated knife and cut the cake in half horizontally.
7. Take jam of choice (in my case, raspberry) and generously spread onto the warm cake. Having your cake warm is important because the warmth kind of melts the jam, making the spreading an even layer easy-peasy. No need to warm jam in a pan and creating an extra dish to wash!
8. Pop top layer back on and it’s ready to eat! To get fancy, sift some powder sugar on this sucker after it’s cooled down!

