Rainy Sunday Vibes

BeesKnees_20160605Rainy spring days have me waking up foggier than usual so brunch this morning with good friends and strong coffee was perfect. When I read that the egg sandwich was made with local english muffins, it was a total “you had me at hello” moment. You can eat this amazing food at Bee’s Knees Supply Company while enjoying the greatest decor. Shiny white subway tiles, rustic wood, and old stoves… c’mon could it get any better?

The rest of the day has consisted of a lazy nap, lunch food prep (it involves replicating a Sweetgreen recipe- hope it turns out good enough to share), and listening to the newest Yuna album. I think Poor Heart is my favorite track on this album. I had the opportunity to see her perform in Boston a couple months ago, and she’s simply radiant.

Wardrobe Essential – Basic Black Tee

Since graduating from college, I’ve been trying to slim down my wardrobe to essentials. I can’t lie, it’s been hard! It needs to happen though! City living is not conducive to plentiful closet space. There’s something super difficult about getting rid of clothing that’s perfectly fine and was purchased by my own/my parent’s money. My rule for putting clothes in the donation pile is asking myself, “When was the last time you wore that?” Last week, I was able to donate four grocery sacks worth of old clothing. SO cathartic.

I’ve also been more careful about what clothing purchases I make. Whenever I’m at a store or shopping online, I now spend more time thinking through what other clothes the purchase would match and the quality too. At this moment, I’m into classic pieces and simply patterned textiles and relying more on flattering silhouettes and bright colors to make my outfits unique to my style. The two pieces of clothing I’m spotlighting as wardrobe essentials are my Uniqlo Supima Cotton T-Shirts.

I’m obsessed with Uniqlo’s Supima Cotton line. It’s super soft and great quality. The fit is perfect on me. Not too tight but hugs in the right places on my upper body. I’ve purchased multiple white tanks that are great for layering under winter sweaters and love the t-shirts (long and short sleeved) to mellow out a very colorful pair of cords or keep an outfit with jeans polished. My most recent acquired piece is the Supima Cotton Crewneck Long Sleeve T-Shirt in black. I am obsessed! I want it in white and heather grey now. The material of these tees is thick enough so my bra, no matter how bright (i.e. neon pink), doesn’t show through.

goods_09_163136

IMG_9075

As you can see, the fit is how I described, not too tight but not baggy. True to size and perfect! Yes, I am wearing my PJ pants in the picture :)

I haven’t washed the long sleeve tee yet, but I have for the tanks and short sleeve– they hold up great and do not shrink. Highly recommend this line at Uniqlo if you’re looking to replace or build your basics.

Thanks for reading, x.

Merridee’s Mint Fudge Brownies

Happy Sunday, everyone! I got back from a weeklong vacation two days ago and am already ready for another vacation. Nick and I spent 5 warm, sunny days in Cancun, Mexico and arrived back home to mid-30º F weather. No bueno. AND it snowed early this morning. I’m over it!! Since arriving back home, we’ve been plotting our next vacation and keep coming back to going home. Home for us is Tennessee! Every time we talk about home, we always come to the conclusion that we have the best food the nation has to offer. I’m particularly proud of my hometown, Memphis. We’ve got a whole lotta grit and soul and so much to offer in terms of things to learn, explore, and eat. I’ll have to write a post one day that shines on Memphis but in the meantime, check out this New York Time’s piece on Memphis- 36 Hours in Memphis.

Franklin, TN comes in second place for fun and tasty TN cities in my book. I also have to mention that Franklin won Garden & Guns’ 2014 Greatest Southern Towns Bracket. I’m not lying when I say I have a lot of home state pride!

My favorite place in Franklin has got to be Merridee’s Breadbasket in Downtown Franklin. It’s the sweetest little bakery that has All-American written all over its menu. Think cinnamon rolls, carrot cake, lemon bars, apple pie, chicken salad, soup in bread bowls, etc. I’m partial to the Chess Bars, but Nick’s favorite thing at Merridee’s is the Mint Fudge Brownies. Since I’m one of those bakers that prefers the act of baking versus eating the baked goods, I searched for the recipe for the brownies so I could replicate a little piece of home for us. It’s a good time to be alive, because I was able to Google “mint fudge brownie merridee’s” and find the recipe! The only blog I could find that specifically states that its recipe is to replicate Merridee’s is the Life, Love, and Good Food blog. I was hesitant at first, but this recipe really does make Mint Fudge Brownies that taste exactly like Merridee’s. Nick and I even did a taste test the last time he came back from a trip to Franklin! Without further ado, please continue reading for the recipe. This recipe makes a big tray, which is great for taking to the office or slicing, wrapping individually, and stowing away in the freezer for sweet tooth emergencies!


Merridee’s Mint Fudge Brownies
Recipe adapted from Life, Love, and Good Food

Ingredients
Brownies
1 cup sugar
1/2 cup (1 stick) unsalted butter, softened
4 eggs
1 cup all-purpose flour
1-1/2 cups Trader Joe’s Organic Midnight Moo chocolate flavored syrup– I prefer this over the Hershey’s syrup since the TJ’s version is not produced with high fructose corn syrup. The texture of the brownie is not compromised with this swap! If you do not have access to a Trader Joe’s you can definitely use Hershey’s or another brand of your choice.
Mint Filling
2 cups powdered sugar
4 tablespoons Creme De Menthe
1/2 cup (1 stick) unsalted butter, softened
A pinch of salt
Chocolate Ganache
2 cups semi-sweet chocolate chips
12 tablespoons unsalted butter

Instructions
Brownies
1. Preheat oven to 350º F.

2. Cream sugar and butter together. Add eggs and beat well. Add remaining ingredients and pour into greased and floured 9″ x 13″ pan.

3. Bake for 25-30 minutes or until done. Cool and top with mint filling and then layer with ganache.

Mint Filling
4. Cream together all ingredients and spread over cooled brownies.

5. Top with one batch chocolate ganache.

Chocolate Ganache
6. Heat chocolate chips and butter in microwave on power 3 for 8-10 minutes or until melted evenly, stirring occasionally. Spread over top brownies and mint filling.

Living that Quarter Century Life

So several things have led me to this post…

  • I caught a really bad cold over the weekend.
  • I couldn’t go outside so I decided to wipe my hard drive clean on my MacBook Pro (it’s at least 7 years old now!) and see if I could revive it… The last time I used this little buddy was probably 2014.
  • I finally grew up and started meal planning, so I’m trying out new recipes and want to document them somewhere! My Pinterest activity has picked up again too. Hope to share my weekly menus here too to hold myself accountable!

That being said, hello again! I’m two years older since my last post and still living life in New England. It snowed yesterday. ‘Nuff said on how I feel about this region of the United States. I’m going to write a post soon about Mint Brownies soon since I’ve been feeling a little homesick lately.

Talk soon, x.

Baby Strawberry Cream Scones!

Hello friends! Spring feels within reach here in Boston. How can I tell? I have a congested nose, and I dart nervously away from all beautiful blooms I come across! I also live in fear of the fierce winds here. Allergy sarcasm aside, one thing I am loving about spring is being able to actually enjoy going to Haymarket on the weekends and see what’s new in produce each week. I like Haymarket, because it’s super cheap, and I kind of get a thrill out of amazing bargains, especially food! Strawberries are always a steal at Haymarket (until this past weekend– $2 a box, humph), either $1 a box or 2 for $3, albeit a little on the riper side. Last week, I scooped up two cartons to make Joy the Baker’s Tiny Strawberry Cream Scones. Hilariously enough, the pint of cream I had to purchase for the scones cost more than the strawberries themselves!

The recipe is super easy, and the results are impressive! Think English tea time impressive. I took most of them to the office at the risk of me eating them all if I kept them for myself at home, and they were gone by the end of the day :D . The strawberry flavour isn’t super pronounced, and the crumb of the scone is so amazingly tender!! It makes me want to explore making biscuits made from cream instead of my tried and true cutting butter into flour + buttermilk method. Below is the recipe (followed it to a T) and pictures for your visual pleasure! Hm. That last part was weird. Whatever.
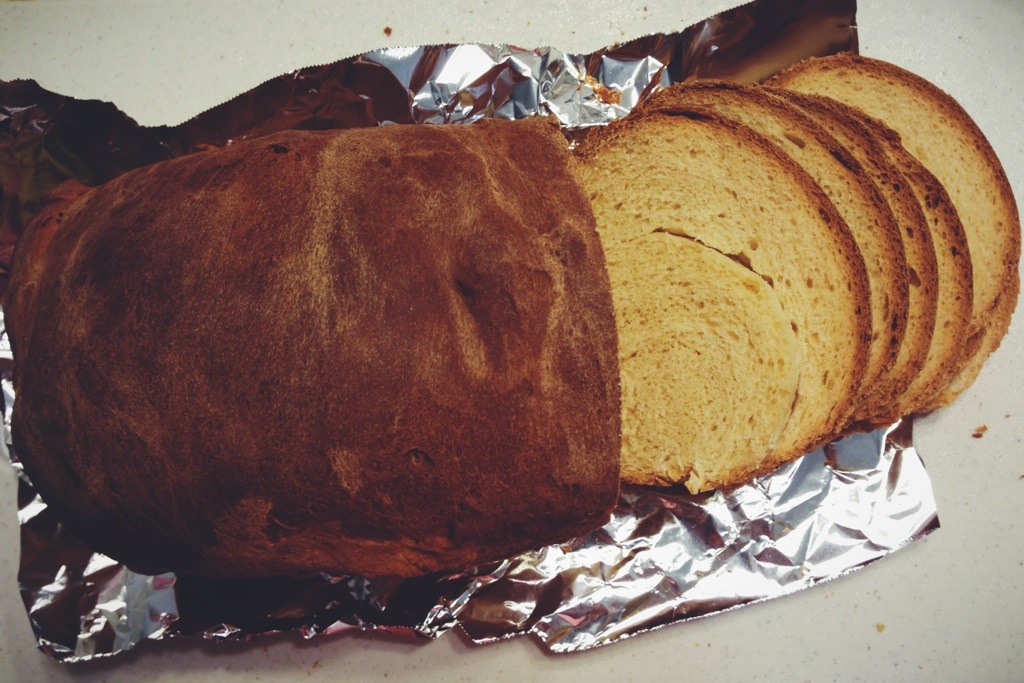
Close up of these beauties.HOLY MOLY.


Baby Strawberry Cream Scones (makes about 20 to 24 small scones)
From Joy the Baker, who adapted the recipe from King Arthur Flour; original link HERE!

  • 3 cups all-purpose flour
  • 1 tablespoon baking powder
  • 1 teaspoon salt
  • 1/3 cup granulated sugar
  • 1 teaspoon pure vanilla extract
  • 1 1/3 to 1 1/2 cups heavy cream plus more for brushing the top
  • 3/4 cup coarsely chopped fresh strawberries … I got a little carried away and used 1 cup-ish. Sorry, not sorry.
  • 1/3 cup chopped white chocolate (optional) … I didn’t have white chocolate laying around for this. THANK GOD.
  • turbinado sugar for topping… I used plain white sugar, because I’m not at a fancy enough stage in my life yet.

Place a rack in the upper third of the oven and preheat oven to 425 degrees F.  Line a baking sheet with a Silpat or parchment paper and set aside.

In a medium bowl, whisk together flour, backing powder, salt, and sugar.  Set aside.

In a liquid measuring cup mix together vanilla extract and 1 1/3 cups cream. Drizzle the cream mixture into the dry ingredients tossing and stirring as you pour in the cream.  Add the strawberry chunks and white chocolate chunks (if using).  Toss together.  Add 2 more tablespoons of cream if necessary to create a moist, cohesive, but not sticky dough.

Dump the dough onto a lightly floured work surface.  Gently gather and knead the dough into a dish and press the disk out into a 3/4″-thickness.

Use a small biscuit cutter to cut small 1 1/4-inch circles from the dough disk.  Brush each circle with heave cream and sprinkle generously with turbinado sugar.

Place 1-inch apart on the prepared baking sheet and bake for 12 to 14 minutes or until golden brown and cooked through.

Remove from the oven and serve warm.


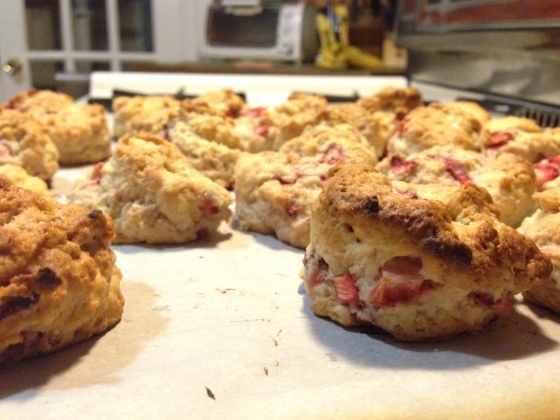
I got adventurous and cut the scones using both the scalloped and rounded side. The scallops stayed throughout baking and is my personal preference!

Cut and ready for the oven!

Fresh from the oven and ready to be devoured. You all should bake these for the scent alone. Getting to devour them is like a consolation prize. Just kidding! The eating part is super important! They aren’t real pretty as my oven is a little temperamental, but I’ll take it!

Golden brown and done.

That moment when your girl crush, Joy the Baker tweets at you! WHOA. Life made!
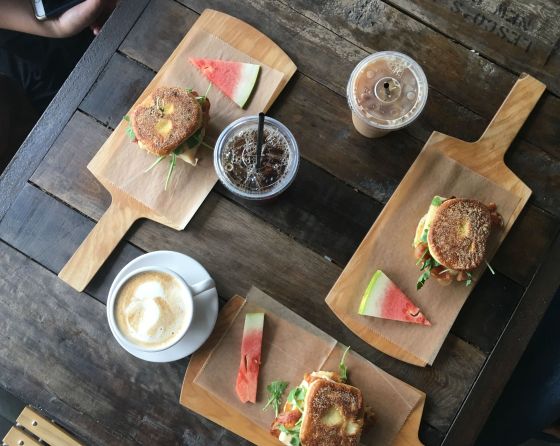
AH!

Semisweet Chocolate, Bittersweet Year

Hi friends! We’re less than 48 hours from the New Year, and I guess it’s time to reflect on this crazy whirlwind of a year I know I’ve had! I graduated from college in May and just moved a week ago from the good ole South to New England! I’m starting a grown-up job in January, and I find myself pinching myself every morning to make sure it’s real. I never imagined to find such a perfect fit of a job so soon. It’s amazing to end this year on such a high note, because there were definitely a lot of bumps along the way. All the disappointments I faced as a post-grad seeking employment definitely made me a stronger and more confident person. Sounds cliche but being employed in a position I’m ecstatic about validates my dreams and work during my college experience. Having to talk about myself extensively during interviews has allowed me to find myself and figure out what I wanted out of a career professionally and personally. I felt super lost after graduation, but now I feel a sense of stability and adventure!

To end the year on a sweet note, I want to share my holy grail chocolate chip cookie recipe with you all! Semisweet chocolate chips are used in the recipe, which speaks to the bittersweetness of this year. No gloom here though! These cookies are sweet! Which is how we’re ending this year! A little about the cookies– these are the perfect combination of crunchy edge and chewy center. The crackling you see in the cookies reveal that ooey gooey chewiness. Not gonna lie, I under-bake at least one tray just, so I can basically eat molten cookie magma haha. Recipe following the picture!

20131230-163326.jpg
Chocolate Chip Cookies
INGREDIENTS:
2 cups AP flour
1/2 tsp baking soda
1/2 tsp salt
3/4 cup unsalted butter, melted
1/2 cup white sugar
1 cup packed brown sugar
1 tbs vanilla extract
1 egg
1 egg yolk
2 cups semisweet chocolate chips (or those of your liking!)
PROCEDURE:
1. Whisk together flour, baking soda, and salt in a bowl and set aside.
2. Cream together the butter, brown sugar, white sugar until well blended. Then add the vanilla, egg, and egg yolk. Beat until light and creamy.
3. Mix in the dry ingredients until just blended. A little white flecks from the flour is okay. Stir in the chocolate chips by hand; the white flecks will go away and no unnecessary gluten is built up in the cookies!
4. Cover and refrigerate the dough for at least and hour. When you are ready to bake, preheat the oven to 325°F.
5. Drop cookie dough 1/4 cup at a time onto parchment lined cookie sheets 3 inches apart.
6. Bake for 15 to 17 minutes or until edges are lightly golden brown. Cool on baking sheets for a couple of minutes before transferring to wire racks to cool completely.

ENJOY & HAPPY 2014 TO YOU AND YOURS!

Holy Grail Sandwich Bread Recipe

20131116-005359.jpg
*Sigh* That is one beautiful loaf of bread, isn’t it? I made two loaves of “sandwich” bread Friday tonight to help confirm if the one I am featuring in this post is the holy grail recipe for sliced white bread that one would use for sandwiches. And yes, it is (although my guest taster sister preferred the buttermilk one)! So I bet you’re wondering why I’m even baking such a plain jane type of bread when I could easily go to Kroger and purchase a loaf. Here are the reasons: 1. I love a baking challenge; 2. I prefer homemade; 3. DO YOU KNOW HOW MANY PRESERVATIVES ARE IN MASS-PRODUCED BREAD??; 4. The flavours that result in homemade bread cannot be recreated in the fast rises that mass-produced breads go through. Also, kneading bread is a great bicep workout ;) . The secret to this bread is that condensed milk is used instead of regular (fresh??) milk. I’m not sure of the science behind it, but the condensed milk creates a moist, tight crumb with a subtle, toasty sweetness that I would liken to a… toasted marshmallow, perhaps? Condensed milk has a complex caramel-y flavour to me and definitely does the job better than granulated sugar and milk!

Many people find the process of making bread really daunting, and I was one of those people in the beginning. I’ve come to the conclusion that it’s the time commitment that scares people off. Because I’m pretty sure all of you can measure 3 1/2 cups of flour and 1/2 cup of condensed milk! Also, the butter wrapping has tick marks for you to cut the required amounts! Getting water that’s warm enough for you to shower in is also something I can see any of you screwing up hah. See, it’s not hard! The waiting game is though! Take your time when you’re rising your bread. It may say an hour to double in size, but it may take longer. Trust yer eyeballs! The flavours in the bread develop during these risings! All this said, bread making from scratch is super relaxing. Stressful day? Knead some dough!

20131116-005412.jpg
Don’t tell anyone, but I get my loaf tins from the Dollar Tree. I’ve baked many a loaf of pumpkin spice and banana bread in those lil’ buddies (as you can see, I have a checkmark on this tin– banana bread experiments)! In the picture above, the loaf is going through its second rise. Make sure to shape your bread nicely before this rise! Otherwise you’ll end up with a lopsided loaf. I learned that the hard way. Make sure to punch out the dough into an even rectangle of the same thickness throughout before rolling it up like a Swiss roll (roll tightly!) and plopping it into your greased tin. In the picture below, you can see that I didn’t roll tightly enough, because there are holes in the crumb and the crust has separated from the side of the loaf :(

Enough chit chat. Recipe’s under the next photo!

20131116-005419.jpg
Sandwich Bread – 1 Loaf
INGREDIENTS:
1 cup water (The recipe calls for room temp., but I use lukewarm to help start the yeast.)
2 tsp active dry yeast
1/2 cup sweetened condensed milk
1 tbs butter (or margarine, but go with the butter, please??)
1 tsp salt
3 1/2 cups flour (may be more or less depending on the weather)
PROCEDURE… adapted from an About.com recipe:
1. In a microwaveable bowl or large Pyrex measuring cup, add your water, condensed milk, butter, and salt. Nuke it in the microwave in intervals of 30 seconds until it is the temperature of water that you would bathe in (or in professional terms, lukewarm). Add the yeast, stir, and watch to make sure yeast activates aka gets a little frothy looking. While waiting for that to happen, this is a good time to grease your loaf pan with butter!
2. Place 3 cups of flour in a large bowl or your mixing bowl that attaches to the electric mixer and slowly add the liquid mixture, waiting until it combines with the flour before adding some more. When it comes together, pour it out onto a floured surface and knead for about 4 minutes until the dough is smooth and soft. Oil a bowl and place the dough in, making sure to grease the dough too. Cover bowl with a cloth and let rise for about an hour of until the dough has doubled in size.
3. After doubling in size, turn the dough out and using your fingertips, shape and flatten the dough into a rectangle that is the width of the loaf pan. Roll up the rectangle tightly and place into the loaf pan. Cover the loaf with a damp cloth and let rise for another hour or until doubled in size.
4. Bake loaf at 350°F for 45-50 minutes or until the crust is golden brown (My loaves took about 55 minutes.). After finished baking, remove from tin and allow to cool fully on rack before slicing. Okay, let cool almost all the way with a little warmth left, so you can slather some butter on a slice and let it get melt-y before eating!

Enjoy!

Waste not, want not | Buttermilk Raspberry Sandwich Cake

And October is upon us… But wait, I’m still daydreaming about cooler weather and fire-coloured foliage, because in my part of the country, it’s still summertime. Pumpkin everything has popped up, but you could feed me strawberries and watermelon and fool me! This year is flying by frighteningly fast, and we’re inching towards the gluttonous months at full speed! Therefore, it seems appropriate to start October off with a recipe post.

Growing up, I’ve always been taught never to waste food. Whenever I told my mom or aunt I was full or finished eating but had scraps of food left over, I would always be reminded that children in Africa were starving and that I should clean my plate. Hilariously, my African friends tell me that the same tactic was utilized by their parents but replaced with Asian children. So it’s always been ingrained in my head that wasting food (or things of any sort) is pretty high on the shelf of “qualities of a bad person,” at least for Asian people. As a kid, I always watched my aunt cook and bake, and she would always repurpose leftovers into another dish for the following dinner. In that sense, I like to think that I’ve taken on that inventive/frugal side of her for finding ways to stretch meals without making them boring and repetitive.

This leads into the trouble I have with buttermilk. As a 22 year old, I’m not really one to be waking up at the crack of dawn to make fresh biscuits every morning for my family, so I usually have a pretty full bottle of buttermilk after using the 1/4 cup needed for the recipe I bought it for. Since it’s dairy, it definitely doesn’t last forever, so I’ve found out via food forums that it freezes fine, which solves basically all issues that I have with buttermilk and my frugality! Yippee! However, knowing that I can’t just make biscuits and strawberry cake out of buttermilk (although both are heavenly, esp. the biscuits) I decided one day to Google “buttermilk cake” and looked for the simplest recipe out there. And I stumbled along Kitchen Trial and Error’s adaptation of a Joy the Baker recipe. I’ve made it once before, and I made it again tonight. It’s a seriously simple and basic cake to make and a must have in one’s repertoire. This cake is dense, rich, and moist, and the top crust bakes up to a slight caramelized crunch that my sister said reminds her of candy. For my version, I decided to slice my cake in half and sandwich raspberry jam in between. The tartness of the raspberry jam works to cut the sweetness in the cake. It’s simply bliss, you guys!!!! I had to refrain from doubling the recipe and making a full on layer cake out of this recipe. Now that I think of it, this recipe would honestly make for a great yellow layer cake recipe with its dense crumb… {Recipe below…}

20131006-004906.jpg There’s something crazy relaxing about spreading the jam onto the cake.

20131006-010153.jpg I’m drooling at the fact that this cake is even better after sitting for a while, because the jam seeps into the cake itself a little. Fireworks in yo mouth.

Buttermilk Raspberry Sandwich Cake                                            
INGREDIENTS:
1 1/2 cups flour
1/4 tsp baking powder
1/4 tsp baking soda
3/4 tsp salt
6 tbs unsalted butter, room temperature
1 cup sugar
1 egg + 1 egg yolk
2 tsp vanilla extract
1/4 cup buttermilk
PROCEDURE… adapted from Kitchen Trial and Error:
1. Preheat your oven to 375°F. Grease the bottom and sides of an 8″ round cake pan and set aside. {I used an 8″ cake pan and liked the resulting thickness of the cake; it was perfect for cutting in half and sandwich jam in between.}
2. In a medium bowl, whisk the flour, baking powder, baking soda, and salt and set aside.
3. In a separate bowl, beat the butter and sugar until creamy and light in color (The butter adn sugar don’t necessarily get creamy as it would for cookies– it’s more like a smooth, sandy texture). Add egg, yolk, and vanilla and mix until mixture is smooth and combined.
4. Add half of the flour mixture and mix until almost incorporated. Add the buttermilk and mix until almost incorporated. Add the remaining flour and mix until incorporated.
5. Spoon the batter into the prepared pan and smooth out so it’s even. Bake for approx. 30 minutes, or until a skewer comes out clean.
6. Let cake cool until warm too the touch and turn it out onto a plate or cake dish. Take a serrated knife and cut the cake in half horizontally.
7. Take jam of choice (in my case, raspberry) and generously spread onto the warm cake. Having your cake warm is important because the warmth kind of melts the jam, making the spreading an even layer easy-peasy. No need to warm jam in a pan and creating an extra dish to wash!
8. Pop top layer back on and it’s ready to eat! To get fancy, sift some powder sugar on this sucker after it’s cooled down!

Review: NYX HD Photogenic Concealer

Hello friends! As you can tell, this is the first post of this sort on this blog. I’m not a real heavy makeup user, and the makeup that I do use is for oil and shine control. Sooooo it’s that week during that time of the month again, and I have two cystic zits on my forehead. Well, never fear! I’ve discovered the best concealer to hide those fellas’. It’s the NYX HD Photogenic Concealer! I purchased mine at ULTA on a buy one, get one 50% off deal ($4.99 regular price) along with the usual $3.50 off $10.00 coupon. These are by far the best concealers I have tried in my 22 years of life on this earth. The only problem with these concealers is that the shades don’t have a good range (at least in store), so I bought the two closest shades and mix them when I am using them to create my skin-tone. This will be good for when my tan fades! In the pictures, the tubes show more yellow than they actually are. In the tubes, it looks like the product has pink undertones, but out of the tube the product applies with yellow/golden undertones.

20130903-142718.jpg 20130903-142728.jpg

On the website, NYX provides these descriptions:
GLOW (CW06): Medium beige with beige undertones
TAN (CW07): Tan shade with red undertones

Obviously, those undertones are not even close to my golden/olive one haha. Upon going to the NYX site, I found out they DO have a “MEDIUM (CW05): Medium beige with olive undertones” but not at my ULTA! I’m assuming that’s the right shade for me… in any case, Glow and Tan work for me too!

Screen Shot 2013-09-03 at 4.26.06 PM

20130903-142734.jpg

It comes with your standard doe foot applicator, but I don’t actually use it directly on my face. I don’t need to be transferring any bacteria on my face into the tube itself! I just swipe some product on my hand and mix with my ring finger, using the same finger to dab and conceal.

The product does dry rather quickly, so the mixing and applying has to occur fast! And when you’re mixing and trying to find the perfect color, it can definitely be difficult. Although thick and creamy looking, it does not feel thick but applies full coverage. I don’t use a brush but dab with my ring finger and get great coverage. It dries to a nice powder finish with no creasing or accentuating the nasty bits you are trying to conceal in the first place!

The following pictures are true to life in terms of the color; (L-R: Glow, Tan)

20130903-142742.jpg

20130903-142747.jpg

I hope my review is helpful; please ask any and all questions if you wish to! I feel a “What’s in my makeup bag” post soon!